
Preserved Home: The meat of the matter — canning is an economical, tasty option
June 3, 2020
Prices are going up on groceries, and with all this talk about a possible meat shortage, people are starting to feel concerned. But what if instead of being worried, you turned stocking up into a delicious, creative adventure — a chance to learn new things while stashing away homemade convenience foods by canning? There is joy in this journey, but first let me put your mind at ease about canning and safety.
 When I suggest to people canning meat is a wise way to stock up on well-priced protein, I’m almost universally met with skepticism. Canning meat sounds dangerous to many. I assure people that pressure canning anything carries equal risk, be it carrots or beef. The fact is, according to the Centers for Disease Control, botulism from home-canned food in general is extremely rare.
According to the CDC, from 1996 to 2014, on average, there were under 12 reported cases per year in the entire U.S. of foodborne botulism from home canning. There was only one case of botulism in 2016 at all in the US from home canning. These outbreaks often occurred because home canners “did not follow canning instructions, did not use pressure canners, ignored signs of food spoilage, or didn’t know they could get botulism from improperly preserving vegetables.”
The cases are low because canning is very simple, and safe. In my research, I could not find any cases where canning meat caused botulism. Also, modern pressure canners are safe — they will not explode on you, which is another common concern.
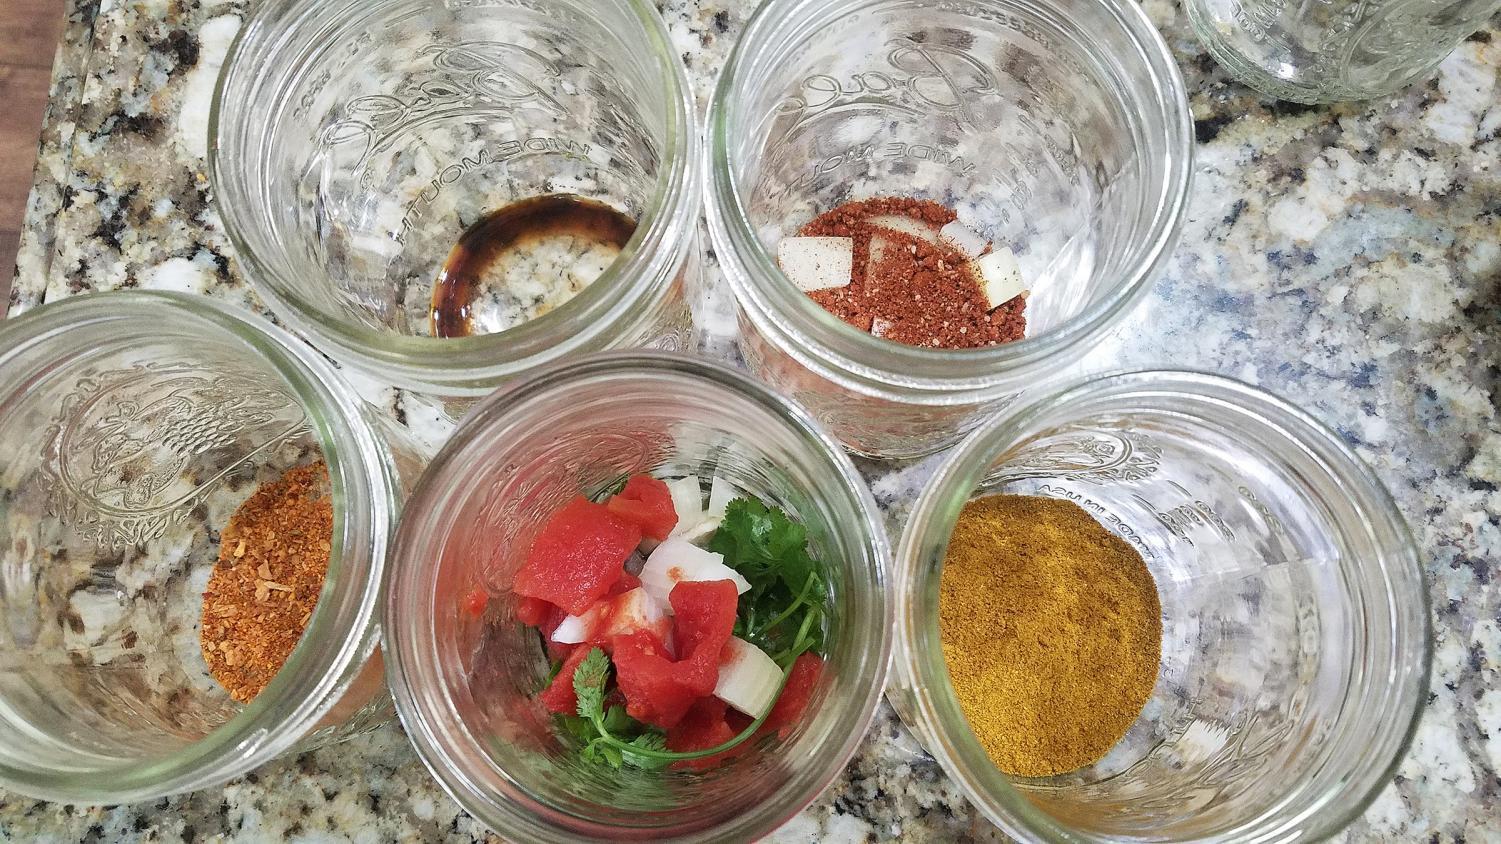
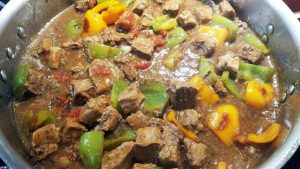
The process of preparing meat for canning is very quick — the majority of time is waiting for the pressure canner to do its job.
Of all the food I’ve canned, meat by far is the easiest. When I heard meat prices were going up, I decided to buy a few roasts and can them up. I did beef chunks and large roast pieces. I also did chicken breast and pork loin. Home-canned meat tastes like it’s been in the slow cooker all day, and it makes its own rich broth, which can be used for gravy, soup or sauce.
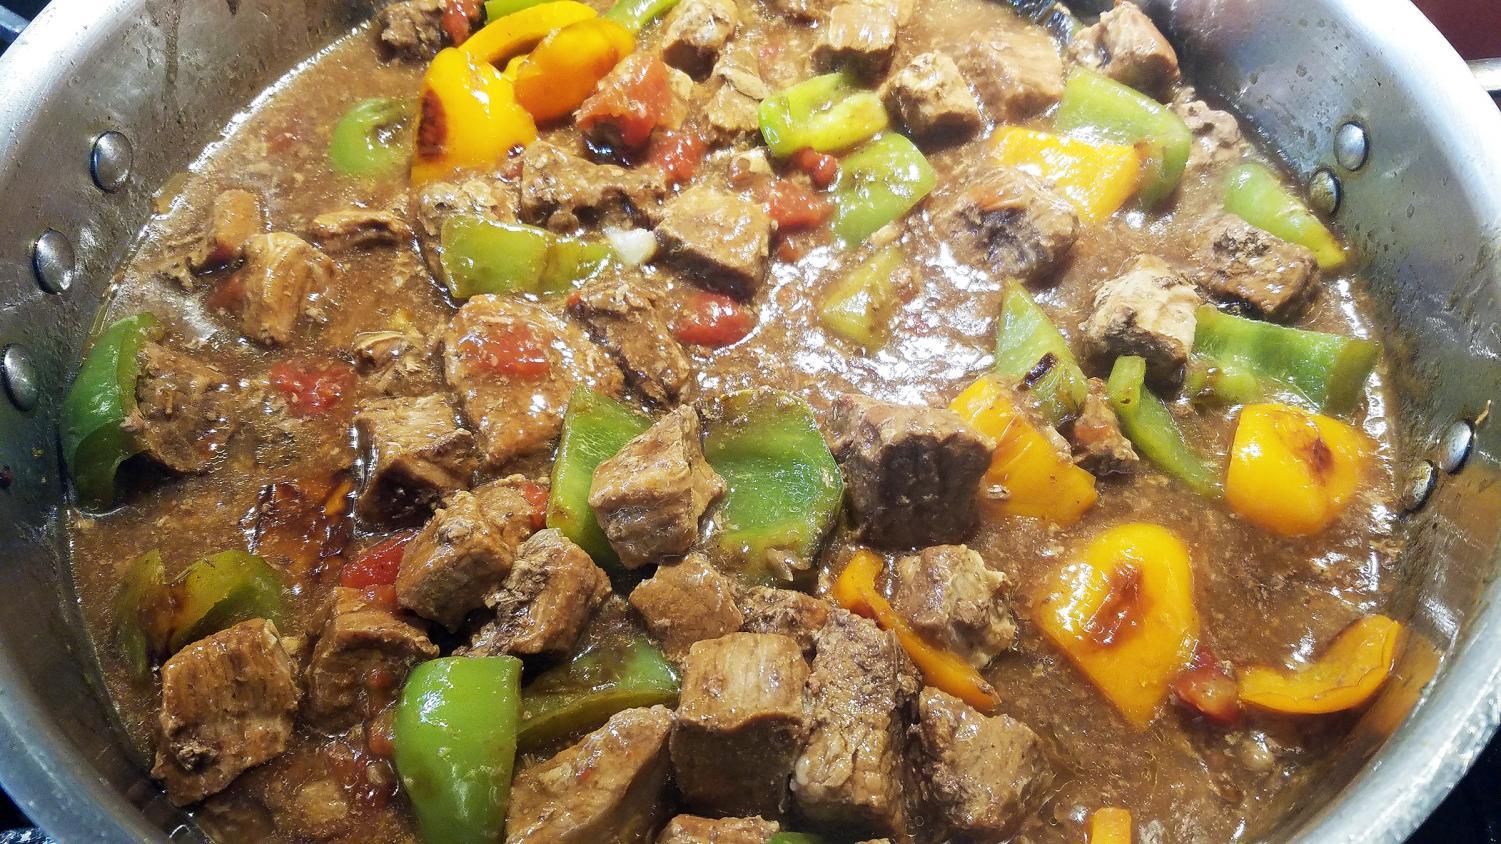
This is where the fun comes in — you can add herbs, spices and vegetables to flavor the meat. I’m still adjusting ingredients to canned pepper steak, but my Mexican canned beef is full of flavor, and its quick protein for a busy night.
You can create your own flavor profile for beef, pork or chicken. I did sample jars I haven’t tried yet for taco chicken, smoked chicken (with liquid smoke), chicken curry and beef barbecue. I do sample jars in pints and might do a canner full of all different flavors as an experiment. For barbecue-flavored meats, people have reported a burned taste when canning in actual sauce. It’s better to add dried barbecue spice to the jar, and add the sauce when you open the jar.
One pound will fit in a pint jar, and two pounds in a quart jar. Use wide-mouth jars for canning meat for ease. The closer you can get to 1 pound a pint and 2 pounds a quart, the more liquid you will have in your jars. Don’t worry if your liquid doesn’t cover the meat — it’s perfectly fine. I use a kitchen scale to ensure I’m getting a full pound or 2 pounds in the jars. There are half-gallon jars, but they have not been tested for canning anything but juice.
The process is simple:
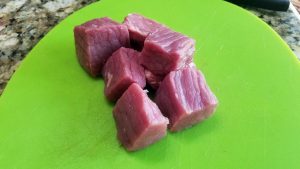
Cut the meat in large or smaller chunks to fit in the jar.
Squeeze the meat into the jar to ensure a tight pack for maximum liquid. The meat itself will shrink.(If adding additional ingredients, you might be just shy of the 1- or 2-pound mark.) Ideally, use a kitchen scale to make sure you get 1 pound per pint, and 2 pounds per quart. However, it does not have to be exact.
You don’t add liquid — the meat will make its own liquid. Just add ½ tsp. of salt to pints, and 1 tsp. to quarts for flavor.
Place new lids on jars, and screw on lids. Process pints of meat for 75 minutes, and quarts for 90 minutes, following your canner’s instructions to determine pressure level. The amount of pressure will be determined by elevation.
Home-canned meat is the perfect convenience food — you know the quality, it’s affordable, and you create your own flavor profiles. Or, you can just can the meat plain. I do a lot of mine plain because it’s more versatile. Also, salt is only added for flavor, so those with sodium concerns can skip the salt if desired. If you want a sandwich, just pop open a jar of chicken, beef or pork. Chicken salad, pork barbecue and roast beef cooked to perfection are all in reach at a moment’s notice.
An adventure in food, canning is a safe and creative way to stock your pantry.
-
The process of preparing meat for canning is very quick — the majority of time is waiting for the pressure canner to do its job. (Photo by Laura Woolfrey Macklem)

-
The process of preparing meat for canning is very quick — the majority of time is waiting for the pressure canner to do its job. (Photo by Laura Woolfrey Macklem)
-
The process of preparing meat for canning is very quick — the majority of time is waiting for the pressure canner to do its job. (Photo by Laura Woolfrey Macklem)
-
The process of preparing meat for canning is very quick — the majority of time is waiting for the pressure canner to do its job. (Photo by Laura Woolfrey Macklem)

-
The process of preparing meat for canning is very quick — the majority of time is waiting for the pressure canner to do its job. (Photo by Laura Woolfrey Macklem)
-
The process of preparing meat for canning is very quick — the majority of time is waiting for the pressure canner to do its job. (Photo by Laura Woolfrey Macklem)


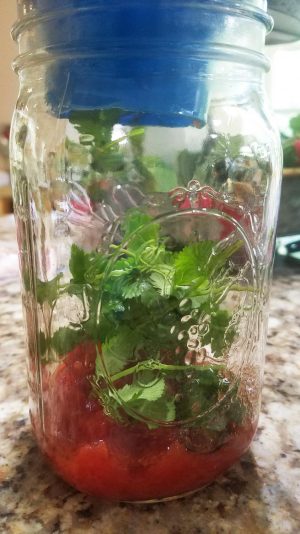
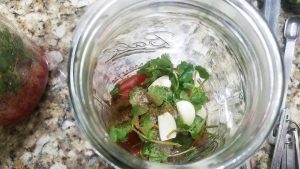
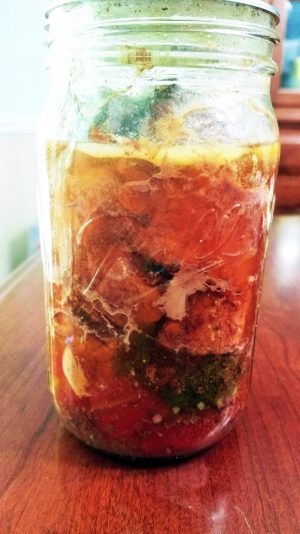
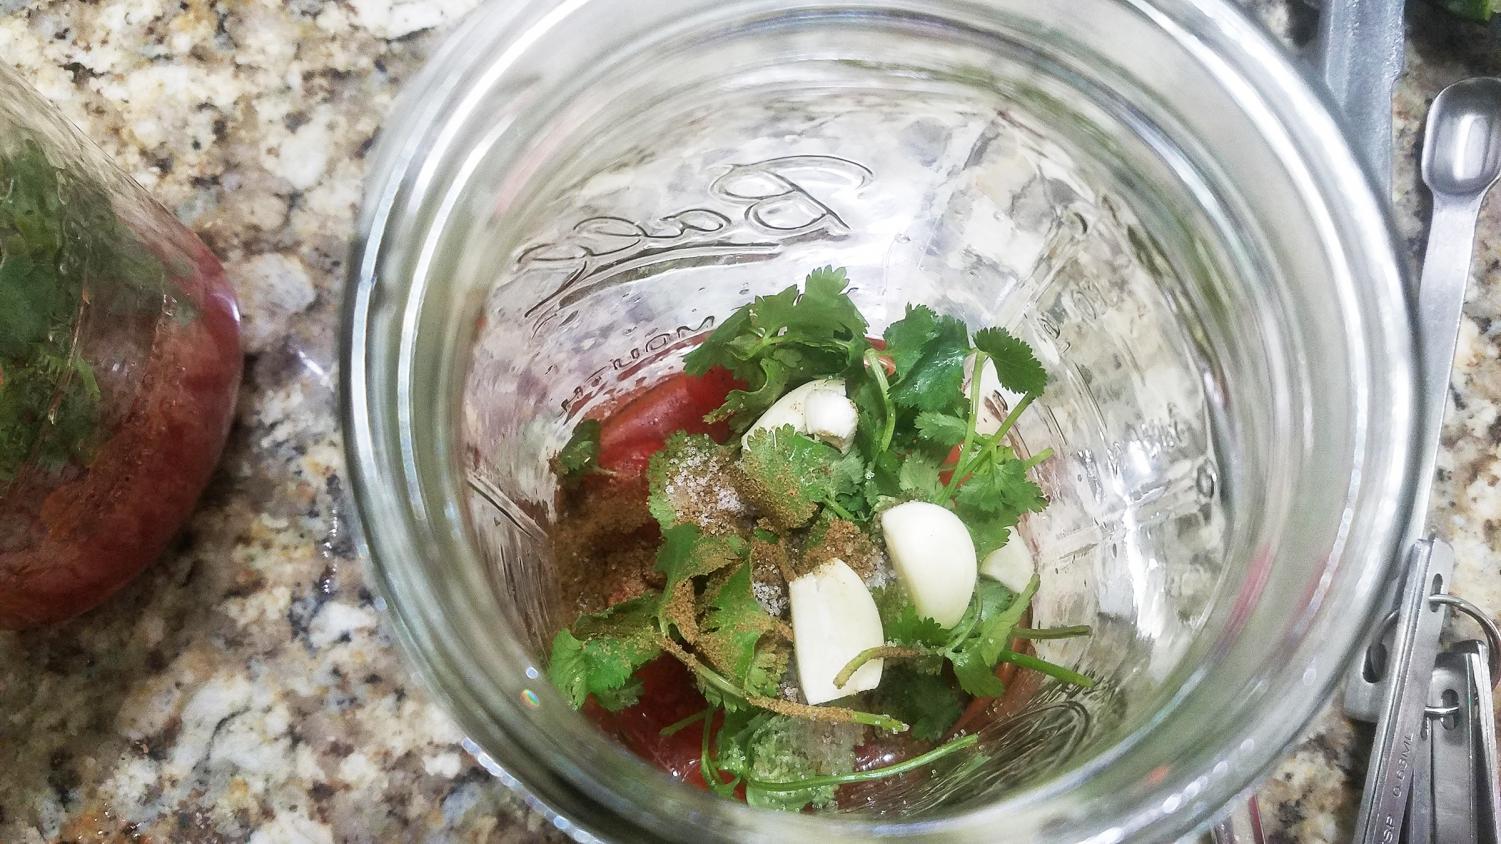
Home Canned Mexican Beef
Ingredients are for per quart, and can be halved for pints.
Two pounds beef roast, cut into 1-inch chunks
Cilantro to taste
1 ½ cloves of fresh garlic, or to taste
⅓ cup onion
3 tbsp. of fresh lime juice
Jalapeno slices to taste (I add two slices for a mild heat)
¾ cup diced tomatoes
1 tsp. salt
Put all flavorings in the bottom of a canning quart jar. Add chunks of beef. Secure lids and rings, and pressure can quarts for 90 minutes, and pints for 75 minutes.
For more recipes, tips and details, visit Laura Woolfrey Macklem’s Preserved Home blog at www.preservedhome.com.
Columns represent the views of the individual writer and do not necessarily reflect those of the North Coast Current’s ownership or management.
encinitas current, cardiff current